In the past, creating a website used to be very difficult, one must have much of knowledge of Web programming, or spend a lot of money to hire someone knows that.
Nowadays, thanks to the rapid development of content management system (CMS), it has become much easier to create websites, people without any technique knowledge can create a website by themselves in a few minutes.
CMS is is a web-based software application that are used to create and manage websites. WordPress(a software, don’t confused with the free blogging platform wordpress.com) is the most popular CMS, and also one of the most powerful CMS. Many years ago, it was just a script that only suitable for creating blog sites, now after so many years of upgrades, WordPress has turned into a powerful CMS that can be used to create websites of a variety of purposes, now 30 percent of top 10 million websites in the world are powered by WordPress
The most notable sites that are powered by WordPress include CNN, New York Times. And the official websites of some renowned universities are also powered by WordPress, such as the website of Harvard University. And many pop stars are using WordPress as the CMS of their official sites, such as Beyoncé, Justin Bieber, Ariana Grande. You can find more websites that are powered by WordPress here.
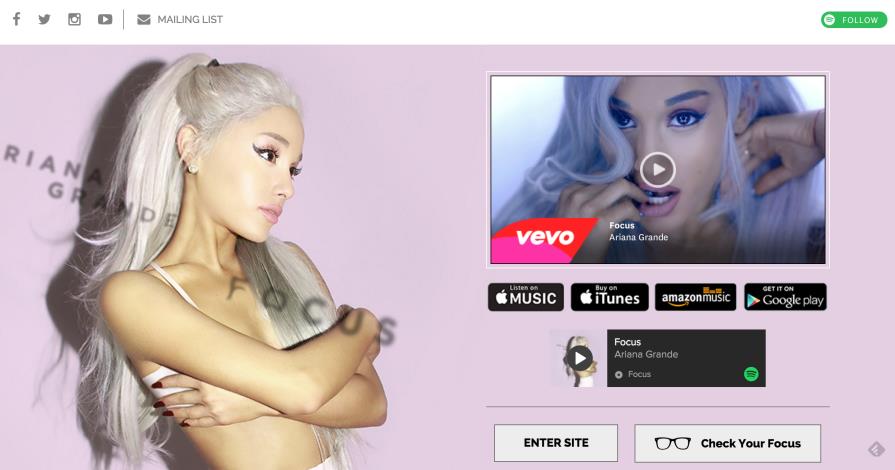
The official website of the singer Ariana Grande is powered by WordPress
WordPress is free and very easy to use, it’s very suitable for beginners, it has a large support community, if you ever meet something that you can’t solve by yourself, you can always post your questions on the support community, and you will get answers in a short time.
WordPress can get you a powerful website in less than 20 minutes. Now let me show you how to start a website or blog using WordPress.
First you will need a domain and a hosting plan, these two items are necessary for all websites, they are also the only things that you need to pay for. While WordPress is free to use to create the websites, you need to register a domain name for your site and host your website at somewhere on the web, which will cost a small amount of fees every year, usually the amount of fee ranges from $60 to $80 a year, but you can get back this small amount of money in a short time if you monetize your website through on-site advertising or other kinds of measures, as we mentioned in another post, if done rightly, start a travel blog by hosting it on your own website can be one of the best ways to get paid traveling the world.
A domain is simply the address of your website, it is the URL displayed on the address bar of browser when visitors land on the home page of a website, like facebook.com,
The hosting is to ask a web hosting company host your website on their servers, the server is simply a networked computer host that stores the data of your website and make your website runs on internet, for this the host is open 24 hours everyday, making your the websites hosted on it visible to visitors from all over the world all day and night. There are lots of web hosting companies, not all of them perform well, we recommend to choose Bluehost, it’s one of Top brands of Web hosting, the company was established in 1997, having a history of more than 20 years, it is especially suitable for WordPress sites and is officially recommended by WordPress.org, their hosting fee is much affordable compared with other top brands like Godaddy. Additionally, if you purchase a hosting plan from them you will also get a free domain.
Disclosure: Please note that the above link is an affiliate link, which means if you purchase through my link I will earn a small commission from Bluehost (at no extra cost to you).
Now you have known what the hosting and domain are, let’s jump into the process of creating the website.
First step: Get a web hosting plan
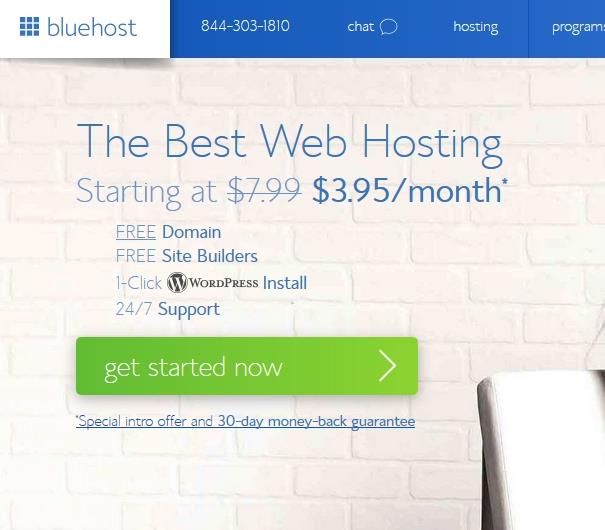
Here we assume you register the host on Bluehost as we recommend,
First, go to the website of Bluehost, the page will be opened in a new tab, so that you can leave this tab open and always switch back here to see the next steps.
Then click “get started now” button, you will be prompted to a page to select a hosting plan.
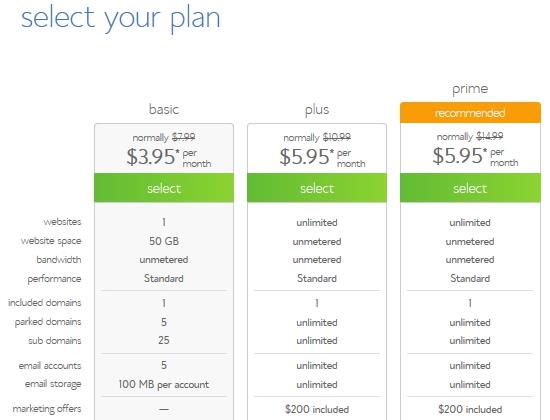
There are three different options you can choose from, for beginners we recommend to choose the basic plan, you don’t need the “plus” or “prime” plan unless the amount of daily visitors to your site is very huge, and you can change your plan to “prime” when the amount of your daily visitors really reach a million someday in the future.
Now they are offering a special discount of $3.95/month on their basic plan, it was priced more than $6/month a few months ago, we don’t know why they offer such a surprising discount these days, so grab this opportunity to get the hosting earlier, the discount will not last long.
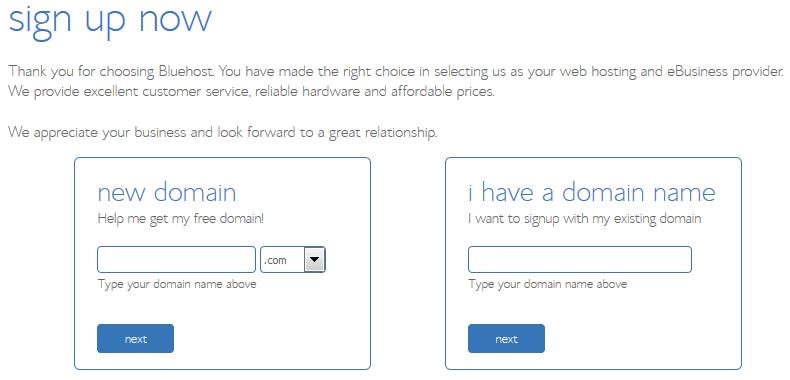
After clicked the “select” button you will be prompted to a new page to type in your preferred domain name in the left box, if you already own a domain name for your website then type it in the right box.
We assume you don’t have a domain name, here is some of my suggestions for your domain name:
1. Domain name can be anything you want it to be unless it has been taken by others, you can type in the name you think out and see if it has been taken, it it hasn’t then use it, if it has, then some of alternatives will show up in the drop-down list, pick one of your choice or try to add some descriptive words or add “-” between the words in your domain.
2. Domain can end with .com, .org, .net, and many other newly invented extensions like .me, .tech, .website, etc. It’s recommended to go with the extension of .com, as it’s still the most used extension, the visitors who type the domain to access your website will usually assume your domain is end with .com, if you use some strange extension they may access to a different site.
3. Aside from the extension, you can choose whatever words you like, domain name is not very important for small businesses, it will not significantly affect your site’s performance unless it’s something ridiculous.
and if your site grows bigger in the future, you can easily change the domain name.
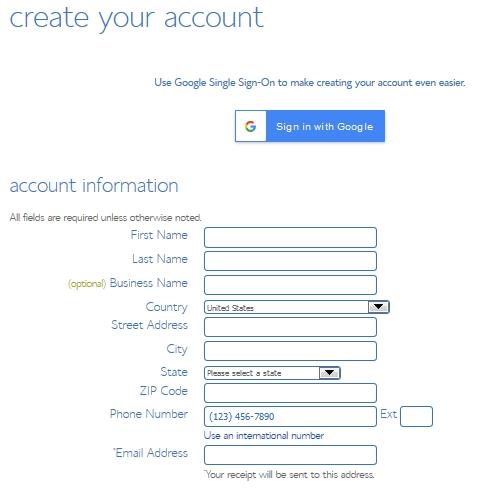
After hit the “next” button, you will be taken to a page to create your hosting account and fill in your billing details.
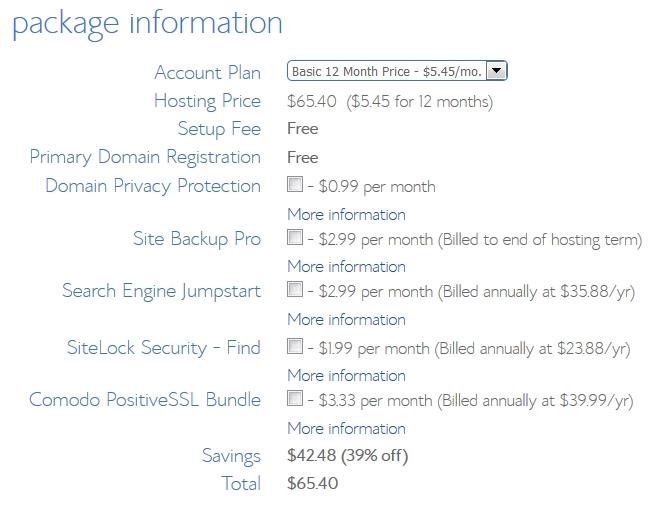
The “account information” part is easy to fill in, for “package information” area, you can choose your preferred hosting package, the 36 months plan comes with lowest fee, the prices for 12 months and 24 months are slightly higher.
You can uncheck all the boxes next to the other products below, your website will run well without them, you can always add those items in the later when you find you really need them.
Then fill in your payment information and hit the submit button at the very last of the page.
Once the registration for hosting is complete, you will be prompted to create a password for your hosting account.
Second Step: Install WordPress
Now you have the hosting and domain set, you can start to build your website, the first step is to install WordPress, which is mentioned above as the best CMS to create and manage websites. WordPress can be easily installed with just one click,to do this go to the control panel after logging into your hosting account, and look for the sign of “install WordPress” in the “website” area. Click on the sign, it will ask you which domain to install WordPress on, then choose the domain name you created in earlier steps in this page, and click “Install now” button, and it will ask you to fill in some basic information of your site, after that you will immediately be able to access to your newly created website.
Third Step: Configure your site
The interface of the website you created will looks boring in the beginning, this is because at beginning WordPress will always use the default theme as the theme of your site, theme is the template that control the appearance of your website, you may have seen many website you visited before have similar appearance, that’s most likely those sites are using same themes.to change the appearance of your website you can change the theme to a more delicate one.
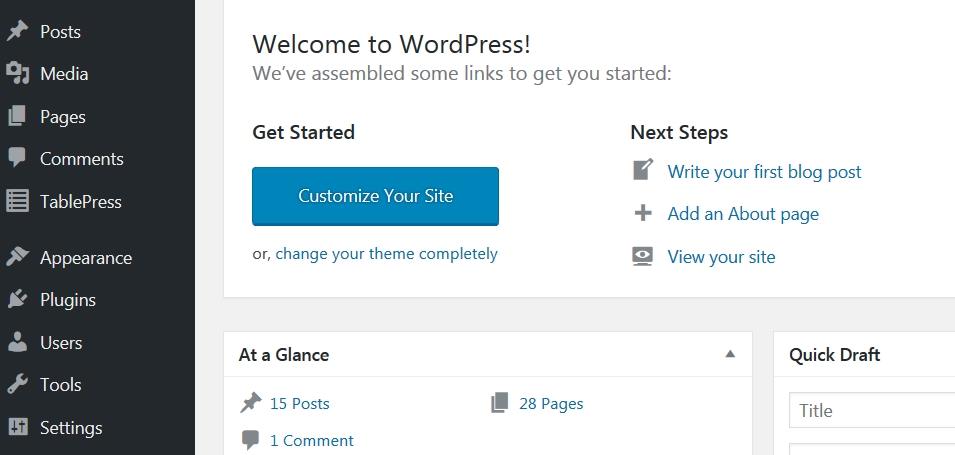
It’s quite easy to achieve this, first go to your dashboard by typing the the following address into the browser address bar: yourdomain.com/wp-admin/(replace “yourdomain” with your actual domain), then you will see the dashboard of your site, it will be something like this:
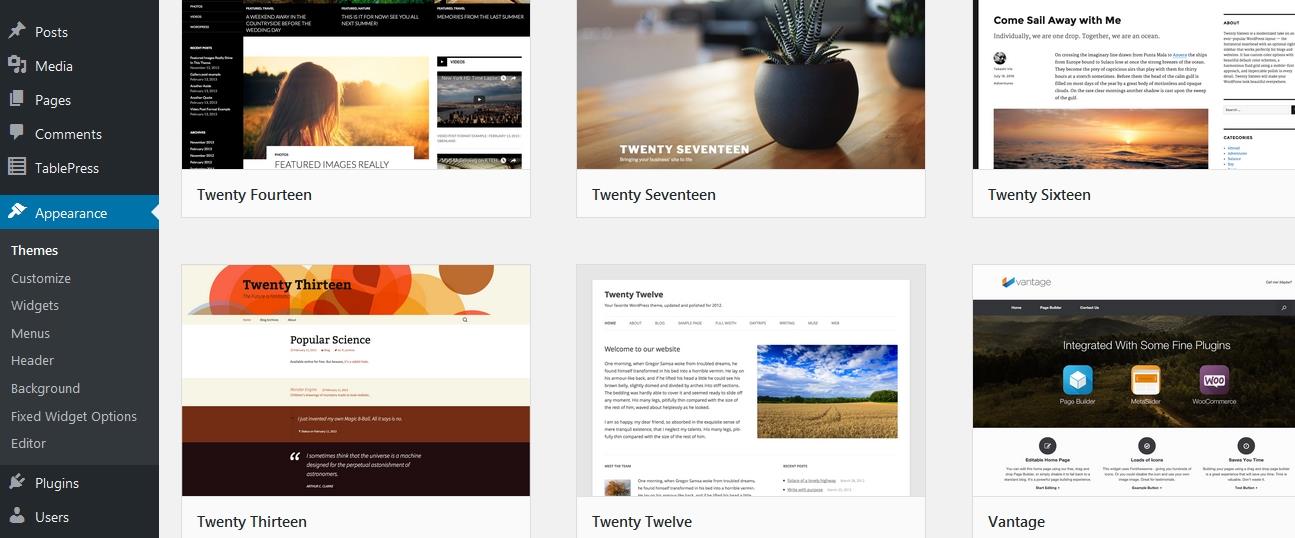
And find the “Appearance” item in the menu column or called sidebar on the left of the screen, hover the mouse on it, a column containing some sub item will show, the first one is “Themes”, click it, a few of installed themes will show up, then look for and click “Add New” button, many different new themes will appear, you can scroll down to find more themes.
These themes are all free to use, feel free to choose one you like, once you find your preferred theme, simply click install button to install it and then activate it, you will then be able to see your website get a new look. If you still don’t like the new appearance you can always change the theme again.
How to create pages or posts in WordPress?
Now the new theme is activated, you need to add some content to your website, to do this you can choose to put your content on pages or posts, if you want your website to become a blog site, then choose post, otherwise you should to put your content on pages.
To create a post, follow the steps below:
1. First access to the dashboard, and find the “Post” item in the sidebar on the left of the dashboard
2. Hover the mouse onto the item, and click the “add new” sub-item
3. An interface looks like Word editor will show up, it has a title bar and an visual editor part, in the editor, you can fill in the text and images.
4. After filled in the content, click the blue “Publish” button right of the editor, then you have done creating a new post.
To create a page, the process is almost same as creating a post, but instead of choosing the “Post” item in the dashboard sidebar, you need to choose at click “Page” item at first, after it everything is same as creating a post.
How to add pages to the website menu?
Most sites have navigation bar or menu near the header of the site, when you created some pages for the menu, you need to add them to the menu, it’s super easy to achieve this, once again, go to the dashboard, and locate and click the sub-item “Menu” within the “Appearance” item in the sidebar, after that you will see a list of existing posts and pages on the left that are awaiting for you to check to add it to the menu, the added menu items will show on the right. You can drag to adjust the position of those menu items. When you are done, click the save button, and you will be able to see your new menu in your website.
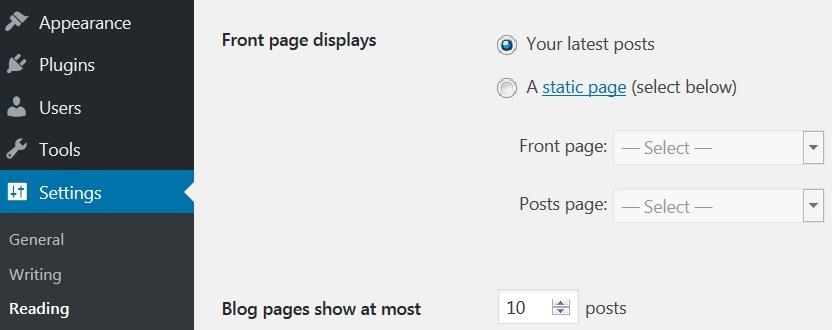
How to make the front page a static page?
By default, WordPress will display your latest posts on your home page, as it was initially designed for blog sites, if you want your site be a static website, you can change the settings with the steps below:
1. Hover your mouse over the “Settings” item in dashboard sidebar.
2. When a list of sub-items show, click the 3rd sub-item that reads “Reading”, you will see a setting page like in the below.
3. Check the second option: A static page. (You need to create your front page in advance), and scroll to the very bottom and hit “Save Changes” button.
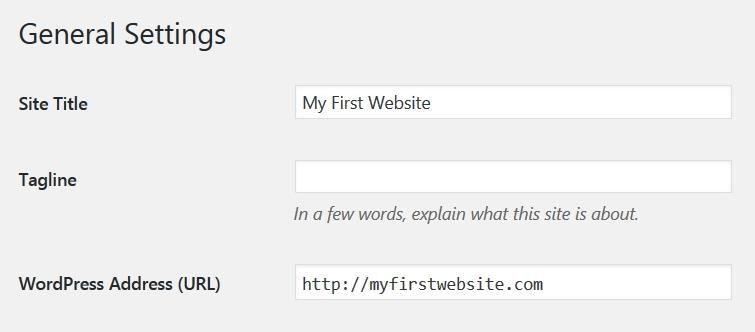
How to change Website title and tagline?
WordPress makes it very easy to change the title of a website:
1. Hover your mouse to the “Settings” item in the dashboard sidebar.
2. When a list of sub-items show, click on the first item that says “General”.
And you will see this:
.Fill in your preferred title and tagline, and scroll to the very bottom to hit “Save Changes”, your website title is changed.


")

")
You must be logged in to post a comment.